If you are a beginner or don’t have a background in design, you should not worry. The PowerPoint app provides many functionalities to help you build the most immersive presentations.
The guideline also introduces how you can use 3D elements in your presentation.
This post will go through 4 ways of building better PowerPoint presentations that our design team mostly recommends.
1. Use a PowerPoint template
We do recommend you use the PowerPoint ready-made templates which is a much quicker way of starting to create clean and sharp slides. In addition, such slide templates may be a great inspiration as you’re planning out your content.
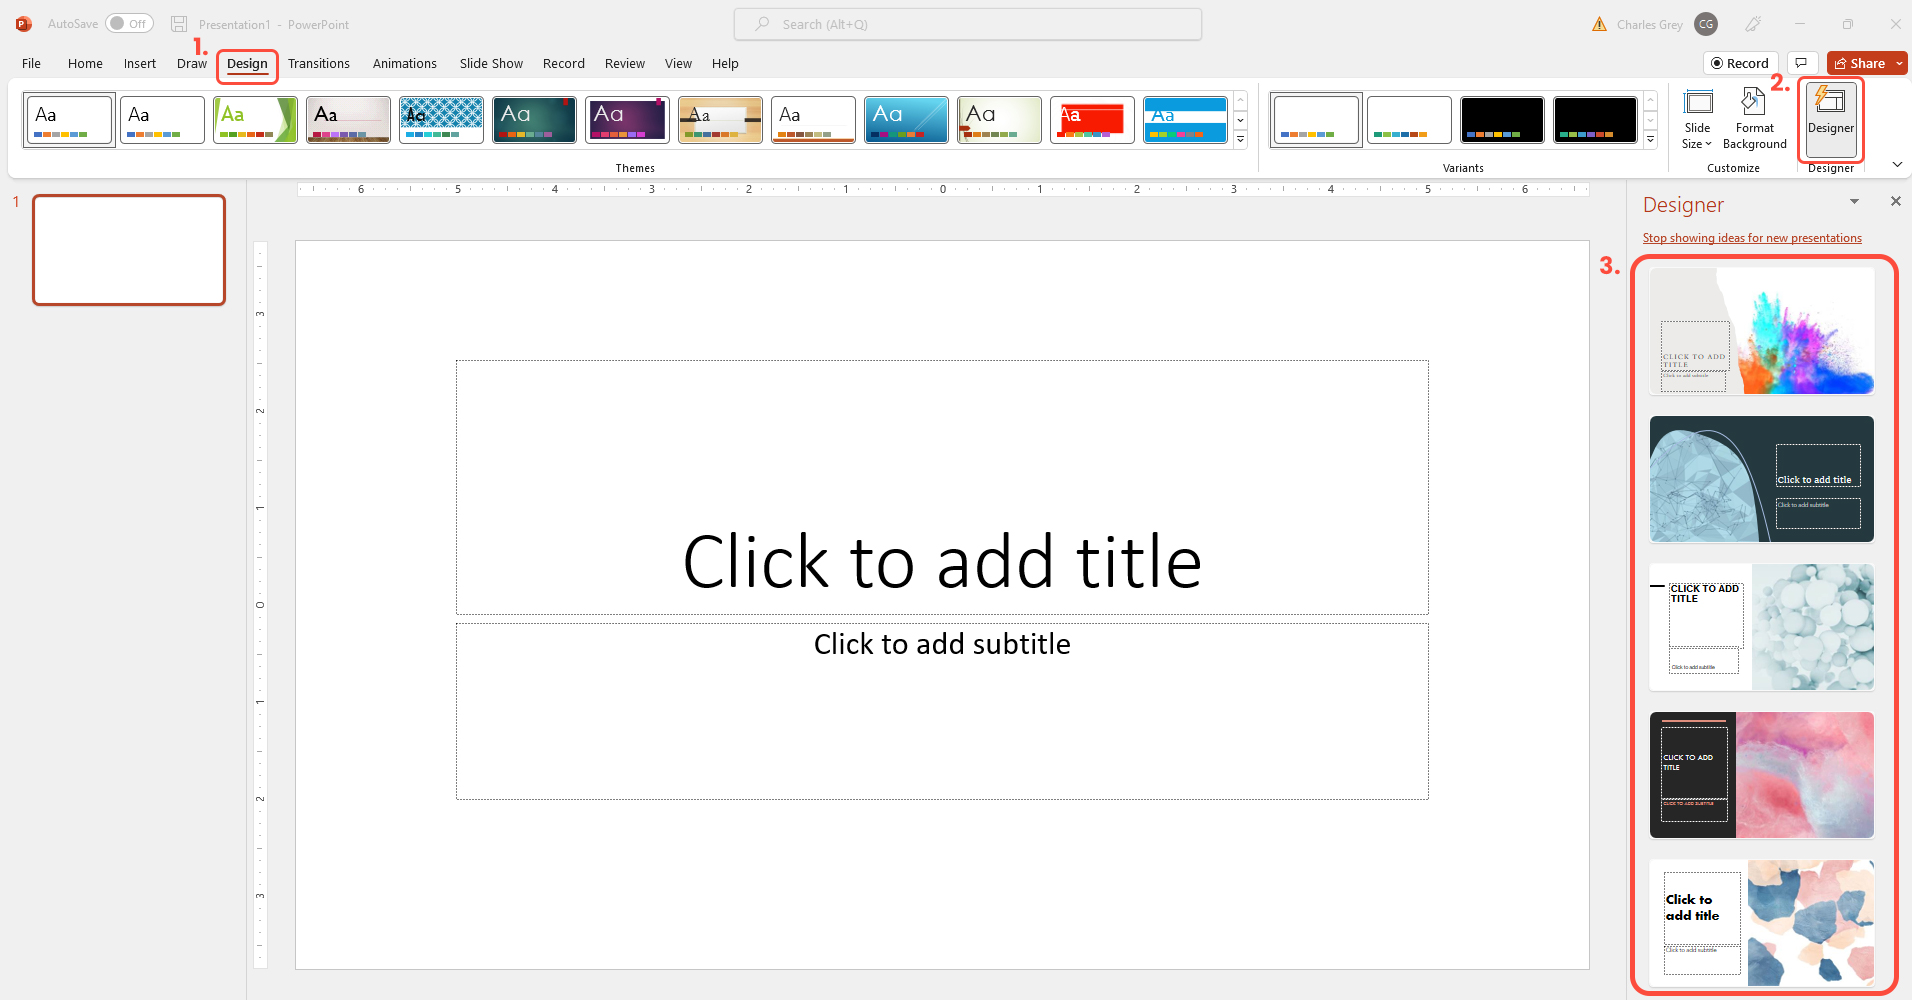
1. Start accessing PowerPoint ready-made templates by clicking on the Design tab -> then click the Designer icon from the top right corner.
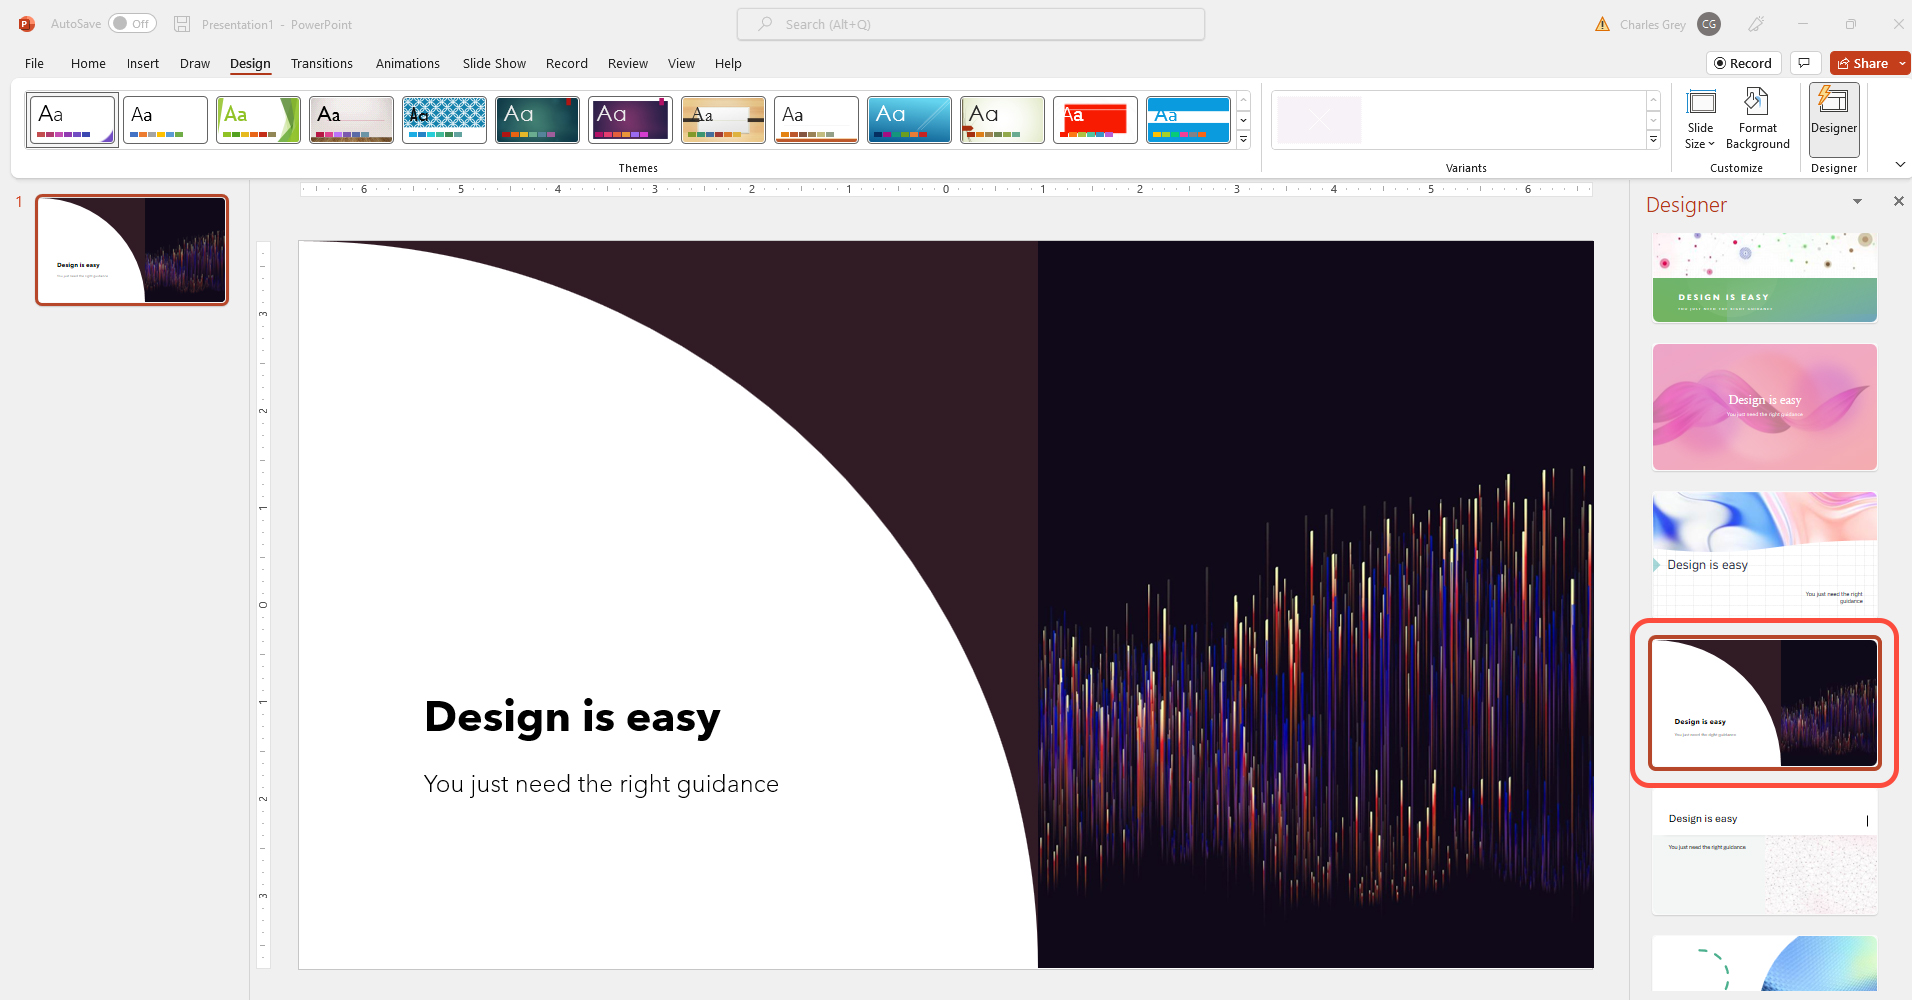
2. Moreover, while you are putting content (our example text) on slides, the Designer will start soon generating new professional design layouts on the right side -> just choose one of them by clicking on it.
2. Embed videos, quick icons and 3D models wherever appropriate
Do you want your presentation to be more impactful? Catch the attention of your audience by including elements such as videos, icons and 3D models that will help your viewer absorb the information.
Why 3D?
Animated 3D models help foster conceptual understanding and visual and spatial thinking. Moreover, 3D elements display objects within space in ways text and images cannot.
Icons.
1.Go to visual elements by clicking on Insert tab -> then click the Icons to start inserting Images, Icons, Videos and other design elements.
You can scroll through the icons or jump to a category by choosing a name in the navigation pane. Once you chose an icon select Insert at the lower right.
2. Once you have inserted the desired elements you can start rotating, colouring, and resizing them as you pleased (this function is limited to icons only).
Important
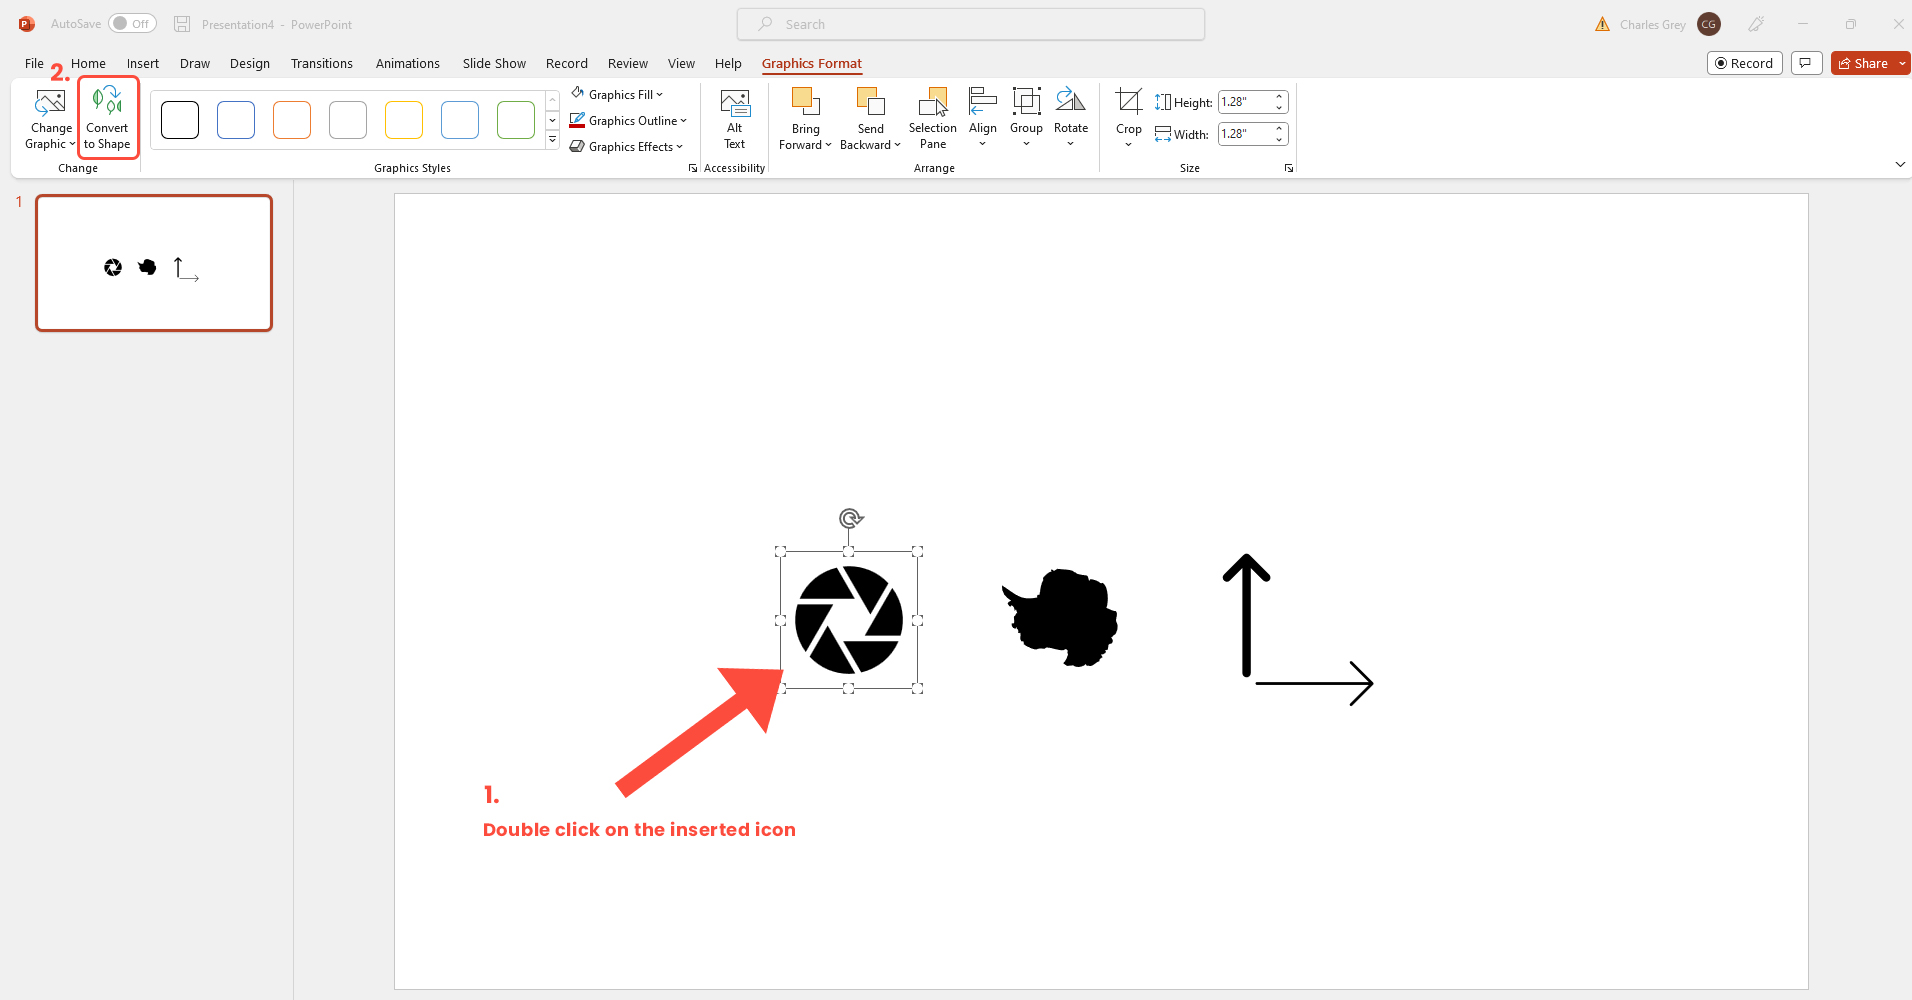
If you want to change the icons’ colour, first, you need to choose the option Convert to Shape for each icon.
First double click on the inserted Icon -> then click the option Convert to Shape from the top left corner.
The options are not limited. Once the icons are converted to shape, you can start fully customising them (change the colour; change the elements’ shape; add other personalized parts to the icon, etc.)
More Icons.
1.If you need to include more graphic representation in your presentation, PowerPoint provides you with more categories of design elements.
You can start navigating through them by accessing the highlights sections from the top. Here you will find sections such as Images; Icons; Cutout people; Stickers; Videos; Illustrations and Cartoon people.
You can also insert multiple icons, images, videos, vectors, etc at the same time by choosing each of them before clicking Insert.
3D Models.
A great way to illustrate a point or catch your viewers’ attention is 3D or three-dimensional models.
1. Microsoft makes it easy to insert a 3D Model! Simply click Insert tab from the Ribbon and choose 3D Models option. Click the 3D icon or the down arrow to open the dropdown menu and choose Stock 3D Models.
Here, you can select from different categories of 3D models. Depending on your chosen theme, you can click and select the 3D model that’s suited for your presentation.
2. Once the preferred 3D model is inserted, you can now resize and rotate the 3D model, using the border points.
3. Use the grid system and align your objects to keep organized slides
Keep your layouts clean and well-structured with gridlines, guides and ruler.
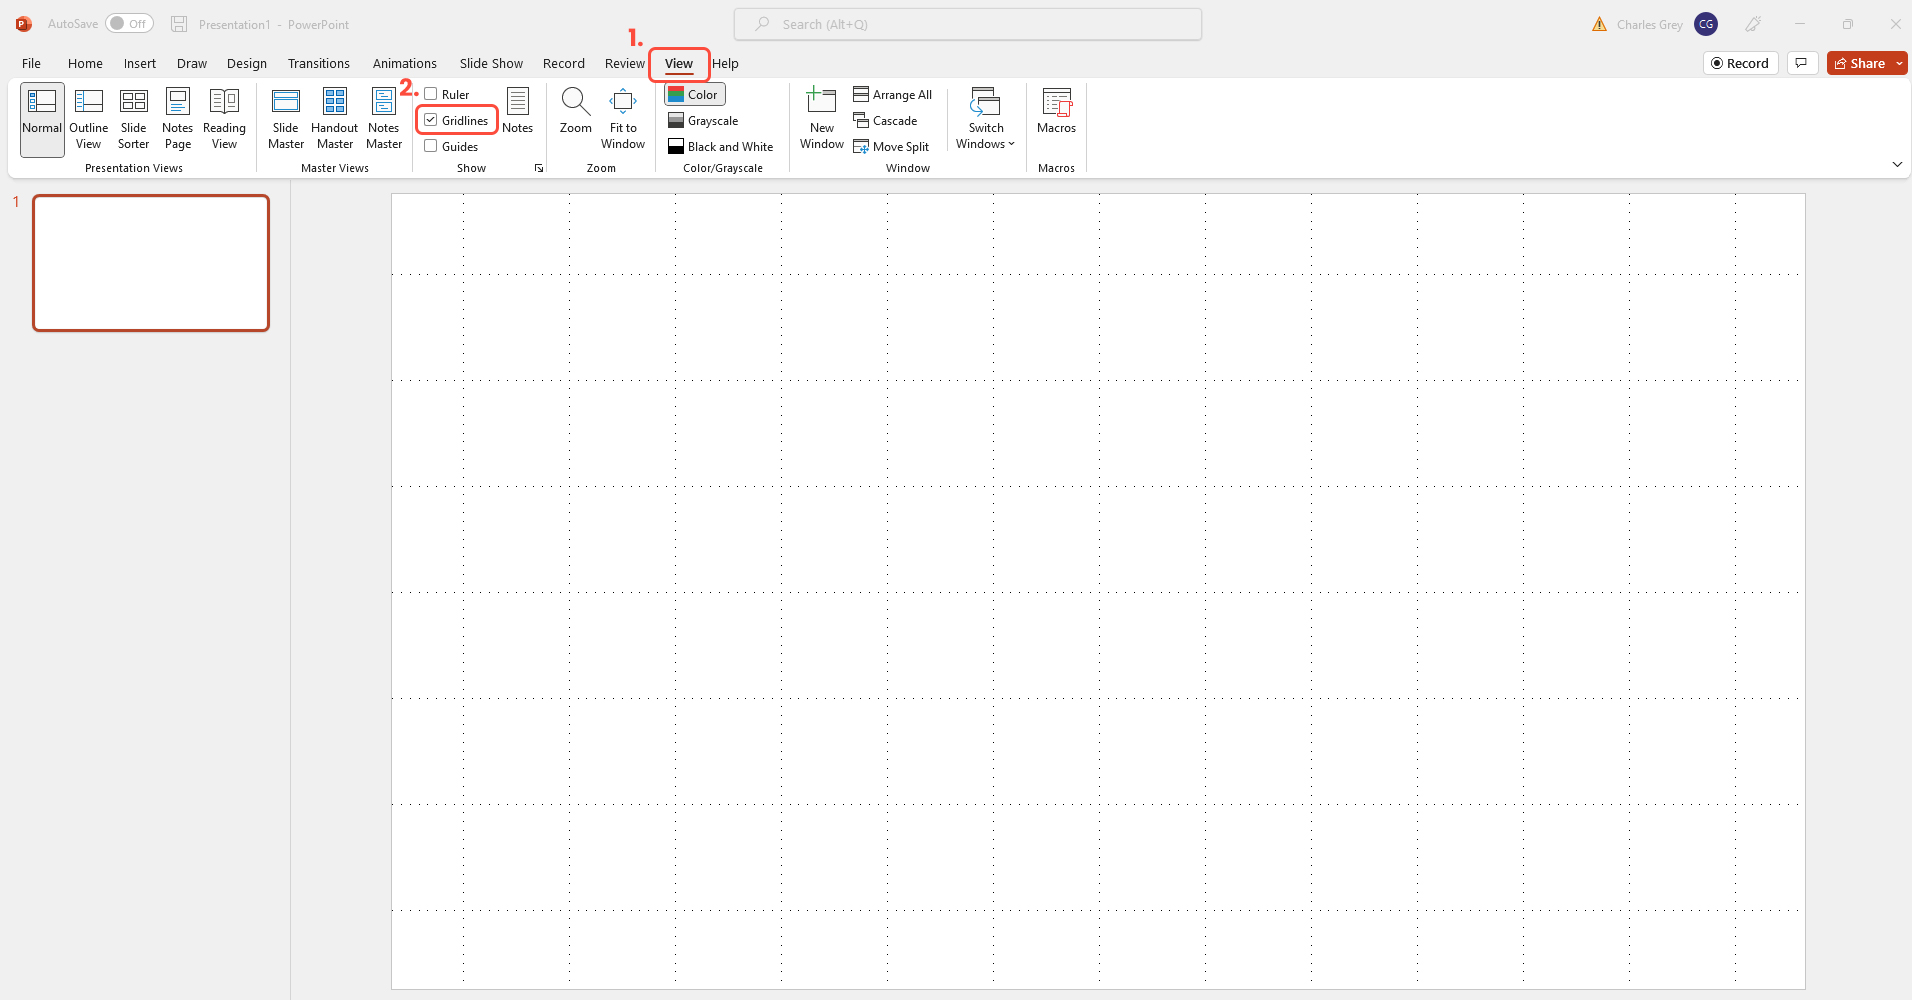
1. You can start adding horizontal and vertical gridlines by clicking on the View tab -> and select Gridlines.
You can change the spacing between the dots by clicking on the dialog-box launcher (you cannot change the distance between boxes)
2. You can also use Drawing guides are a pair of dotted guidelines, one vertical and one horizontal, that intersect at the centre of the slide. You can drag them or add as many as you need.
You can add guides by clicking on the View tab -> and select Guides.
If you are interested to know more tips about grids and guides click here
4. Use Hyperlinks (across slides and external)
Use Hyperlinks between slides to create a non-linear experience. Learning to hyperlink across slide decks enables you to build interesting interactions. You can move around within your presentation using any object on your slide and have it link to other slides.
Start creating clickable areas.
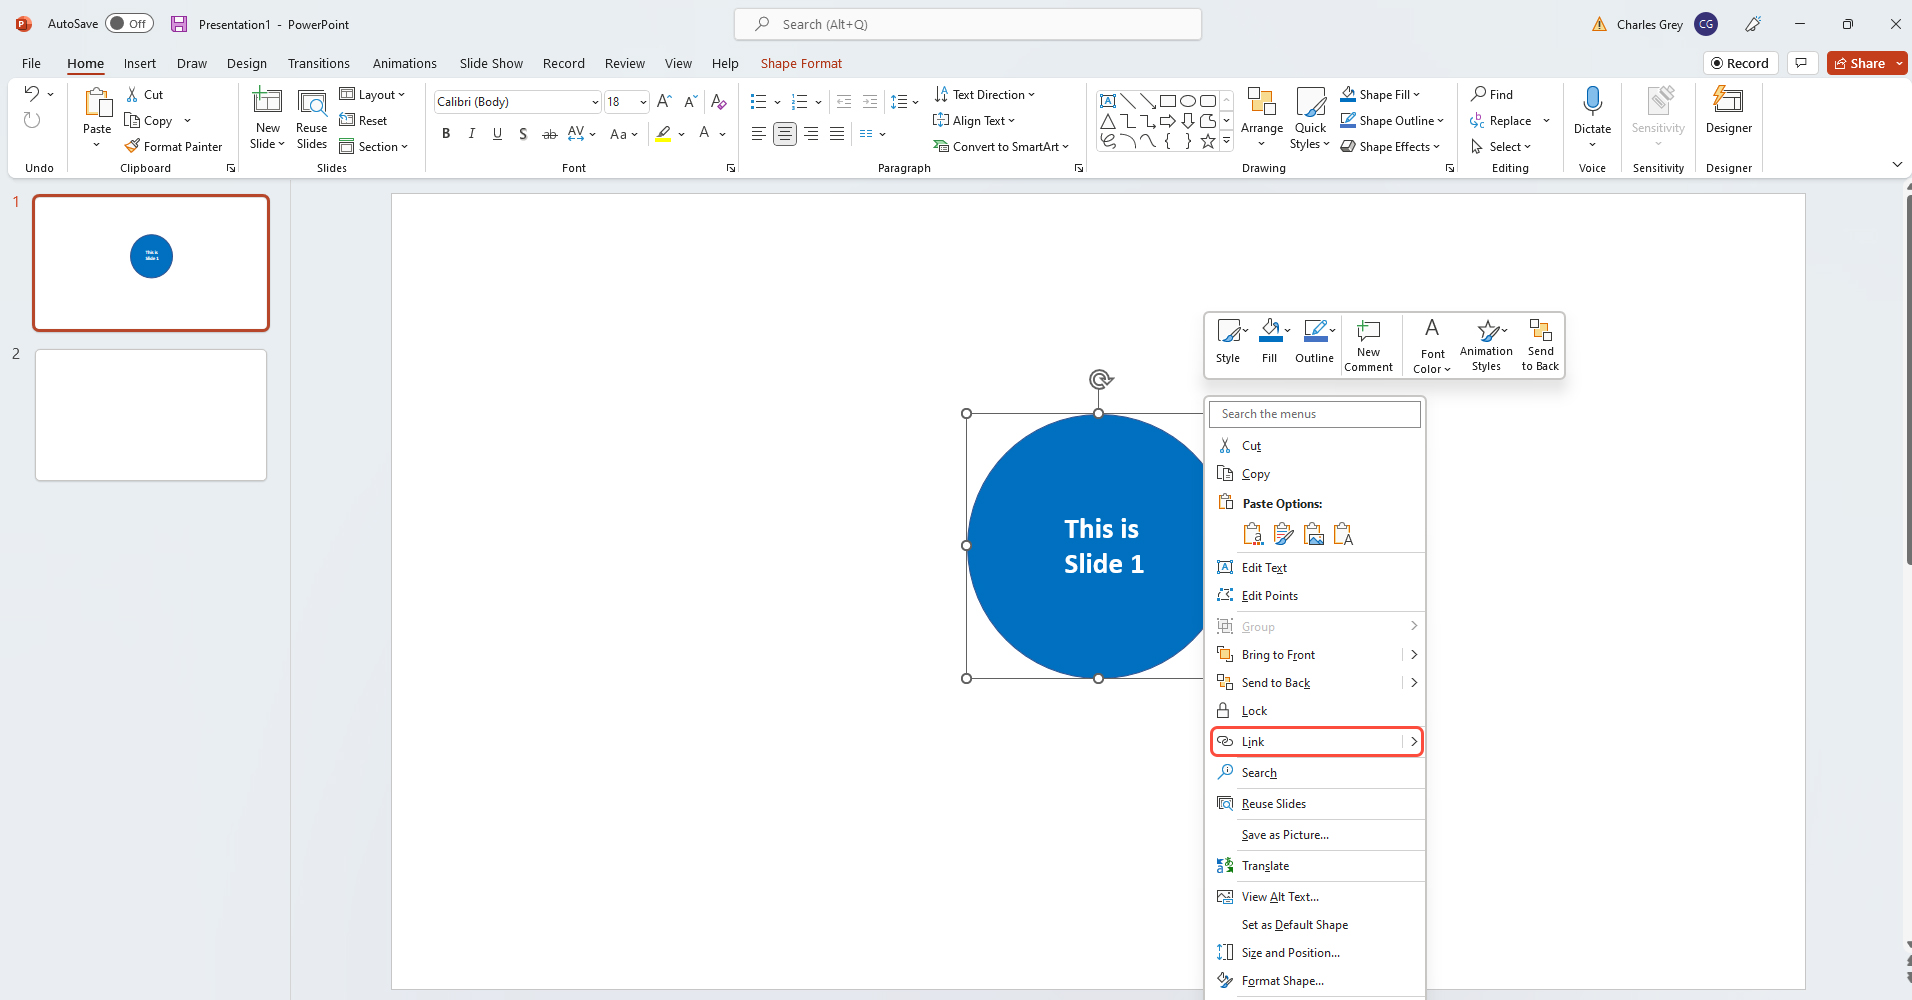
1. First, insert an object or text on your slide. In this guide, we will use a circle object -> then right-click on the object and choose Link.
Start inserting links to clickable areas.
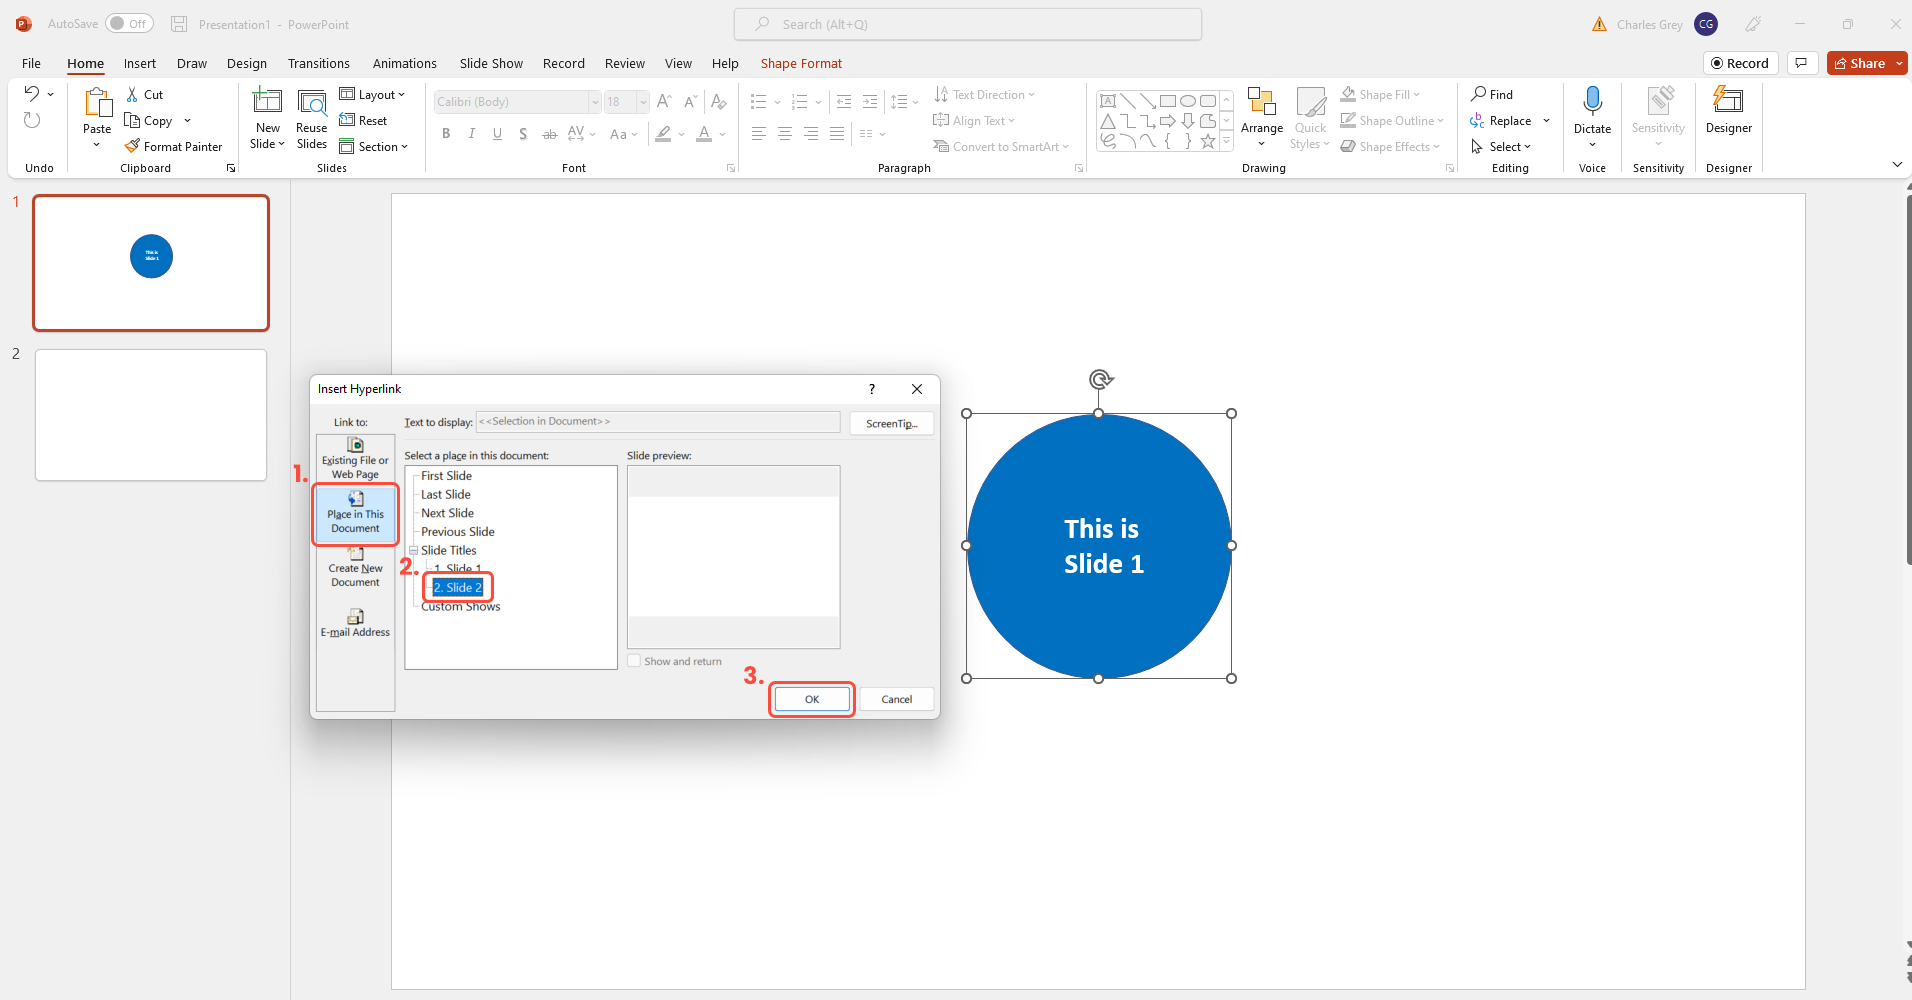
2. Next it will open a dialogue box called “Insert Hyperlink”. Here we have 4 options. We will choose Place in this document option to link two slides -> Select Slide 2 and press OK.
In this guide, we chose to link slide 1 with slide 2. Depending on your need you can start to link any slides with any objects or texts you want. Moreover, you have the option to link your objects or text to external sources such as documents or web addresses.
Bellow you can find a list of how to apply the hyperlinks
Existing file of web page– link a file from your computer or any web address
Place in this document– ink to a specific slide in your presentation.
Create New Document– Link from your presentation to another presentation.
E-mail Address- Link a displayed email address to open up a user’s email program.
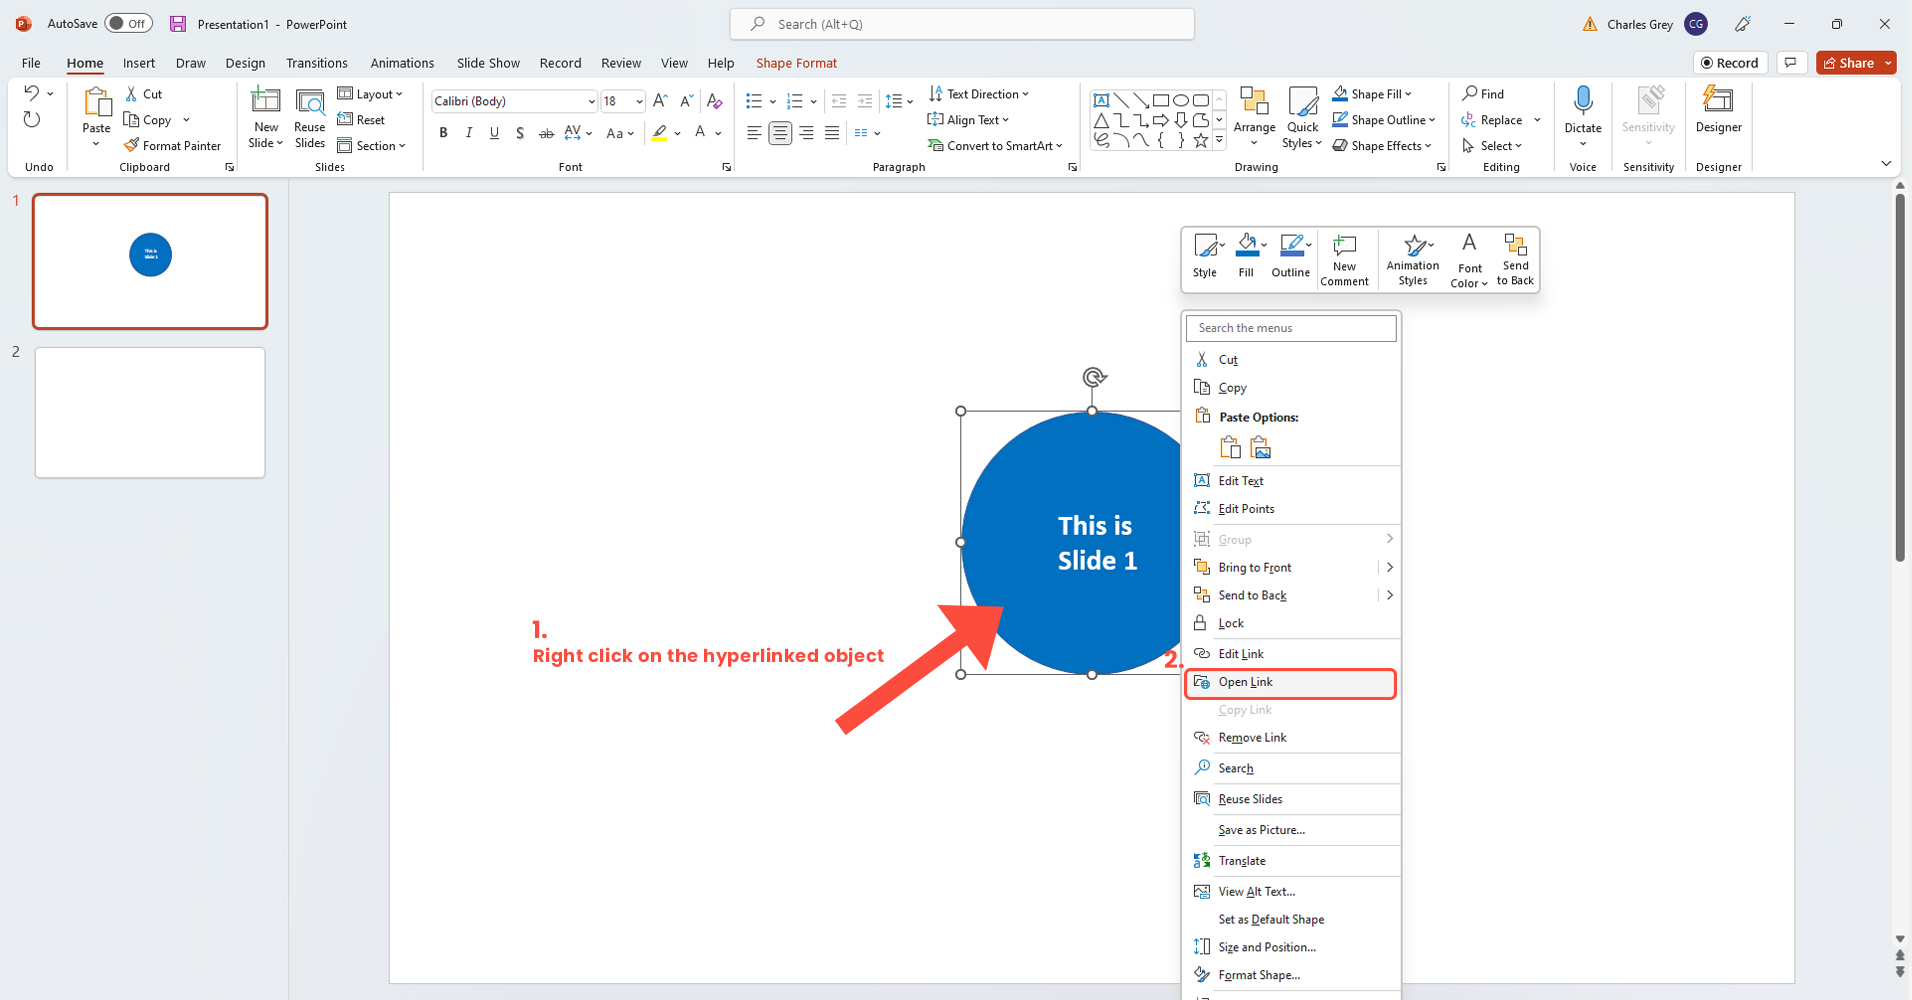
3. Now you can check how the link works by using the command ctrl+ left-click on the object or you can right-click the object/hyperlink and select Open Hyperlink option.
4. If you want to remove the hyperlink, right-click the object/hyperlink and select Remove Link option.